Passes
The Passes view displays the document nodes relative to rendering and compositing.
The Passes view can be used to render in local and see images in the user interface, render in batch or render on the farm. You can also choose to render with Hifi or Lofi quality.
A RenderPass represents the action of sending the whole scene graph to the renderer and will ultimately produce an image.
RenderPass
- Create a RenderPass by using 'Menu bar > Create > Passes' or by using '
 > Create > Passes' in a Browser or Node List view.
Guerilla don't compute the dependencies between the different render passes and let this task up to the user. The order of rendering of Passes goes from bottom to top (or increasing Order).
- Change order of a RenderPass by clicking on buttons
 at its right in the Passes view or by using 'Pass > Order' in its Property view.
Local and Batch mode
A common operation with passes is to render only a few of them and reuse results of previous renders for some passes. For instance when rendering a scene that has a light with a shadow map you need to render the shadow map pass only once unless you modify light or pass attributes. The next render can be done with the main RenderPass in Solo mode so that only this pass is rendered. You can have any number of pass in Solo mode.
- Toggle between 'Solo ON' and 'Solo OFF' using the button
 at the right of a RenderPass in the Passes view or by using 'Pass > Solo' in a RenderPass Property view.
You can also explicitly specify for each pass if it will be renderer or not.
- Toggle between 'Rendering ON' and 'Rendering OFF" using the button
 at the right of a RenderPass in the Passes view or by using 'Pass > Disabled' in a RenderPass Property view.
Farm mode
For now we saw how to enable/disable a pass or many ones when working in local or batch mode. We can achieve same effects in farm mode albeit you know specify it on a per sequence basis.
- Toggle between 'Manual update', 'Once for sequence' and 'Each frame' using buttons
 ,
,
 and
and
 at the right of a RenderPass in the Passes view or by using 'Pass > Validity' in a RenderPass Property view.
RenderLayer
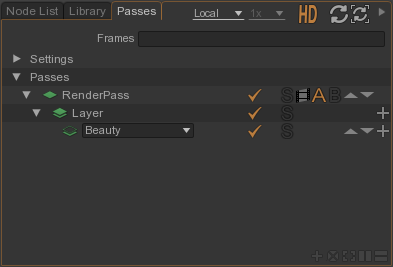
It's often desired to separate primitives and render them in distinct layers (foreground, background, matte). This is done by using layers. By default a RenderPass contains one single RenderLayer. You can create additional layers if needed.
- Add a layer in a RenderPass by clicking on the
 button
at the right of a RenderPass in the Passes view or by typing 'output/layer' in the Node Picker when in a RenderPass Node Graph.
button
at the right of a RenderPass in the Passes view or by typing 'output/layer' in the Node Picker when in a RenderPass Node Graph.
AOV
It's often desired to have for a RenderLayer multiple output images (for compositing purpose). This is done by using AOVs (Arbitrary Output Value). By default a RenderLayer contains one single AOV (the Beauty). You can create additional AOVs if needed.
Guerilla Render comes with predefined AOVs that are ready to use : Beauty, Albedo, Ambient, Diffuse, Id, etc.
- Add a standard AOV in a RenderLayer by clicking on the button
at the right of a RenderLayer in the Passes view or by typing 'output/AOV' in the Node Picker when in a RenderPass Node Graph.
You can also create custom AOVs.
- Add a custom AOV in a RenderLayer by clicking on the button
at the right of a RenderLayer in the Passes view or by typing 'output/AOV' in the Node Picker when in a RenderPass Node Graph.
- Type the custom AOV name using the combo box.
When rendering in local mode the first AOV of each RenderLayer of each RenderPass get displayed in a RenderView during its rendering. You can visualize individually each AOV in a RenderView.
- Select the RenderPass of the AOV by drag & dropping the RenderPass from a Passes view to a RenderView.
- Visualize an AOV by clicking on the desire layer then the AOV using drop down menu in a RenderView.
- Visualize an AOV by drag & dropping the AOV from a Passes view to a RenderView.
Types
A Passes displays document nodes of the following types:
- RenderPass
- RenderLayer
- Compositing
- ShaderNodeShadow
- ShaderNodeSSS